Examining Photo Selection and Line Thickness Closely
Discovering how to translate photographs into sketches can quickly teach you that a single line’s weight may either make a drawing shine or feel flat. This procedure may call you for a quick trial with the tool to turn photo into line drawing online free. Conveying emotions and depth in a drawing depends much on the line thickness. A thicker line can inspire audacity. Often whispering subtlety are thinner lines. Artists have long argued about which method finds the proper balance.
Just as much of a factor as line thickness is the choice of picture. A nicely selected picture may give a drawing life. One could likest a drawing with thick strokes to a roaring engine and a drawing with fine lines to a mild wind. Both have great appeal depending on the issue.
Effect of Various Line Weights
Different line weights provide different moods. See a comic strip with thick outlines jumping at you. Next think of a precise blueprint layout that calls for exacting fine lines. Every technique has a function. Thick lines, for example, let significant elements leap off the page. Fine lines catch minute details. The last look of your artwork depends on balancing strong and delicate.
Varied line weights in informal sketches create a layered appearance. The main subject may have thicker borders around which finer lines capture the details. This dynamic range lets the drawing feel alive instead of fixed. As such, painters frequently guide the viewer’s attention with varied line weights.
Photo Selections: Best Approach
Not every picture works nicely for a line drawing. High contrast photos allow conversion easier than those that seem flat. Good starting point are images with strongly defined edges and distinct shapes. Should you choose an image whereby items merge into one another, the outcome could seem confused. Try running across images with different subjects. This preserves the fundamental character of the photo in its drawn form.
It reminds me of cake baking. Good things count. The best base is a picture full of contrasts and strong forms. Conversely, a hazy or too complicated picture could lose any artistic appeal when reproduced in lines.
Juggling Boldness with Detail
Line width is experimented with by artists to provide their works depth. For example, strong lines encircling the outline of a topic grab the viewer right away. By adding fine lines for internal features, on the other hand, one produces a layered reality. See a busy metropolitan street drawn in pen. The structures are defined by bold lines; fine lines catch window details and textures. Every element drawn comes alive with this method.
Using different line weights is more about establishing a clear visual hierarchy than about being unduly fancy. The observer’s eyes should land on a drawing and they should grab its focal point right away. Drawing can be enhanced even more by techniques including shading and cross-hatching. Sometimes using basic strokes can cause unexpected results in the output.

Advice on Using Line Thickness Practically
Diving into line drawing conversion calls for a practical method. Begin with a basic drawing. Change the feel of the drawing by varying pen weight or brush size. Start with little areas first. Try using those ideas to more difficult designs after you understand how changes affect the general flow. Recall that every stroke matters. One mistake may ruin the whole piece.
One can benefit by dissecting the drawing process into smaller tests. Try several line weights side by side, for example, in a corner of your paper. Look for whatever best captures the intended feeling. Through this practical exercise, you avoid possible regrets. You may find that your artwork gains a fresh and appealing twist from a quickly sketched thin line coupled with thicker frames.
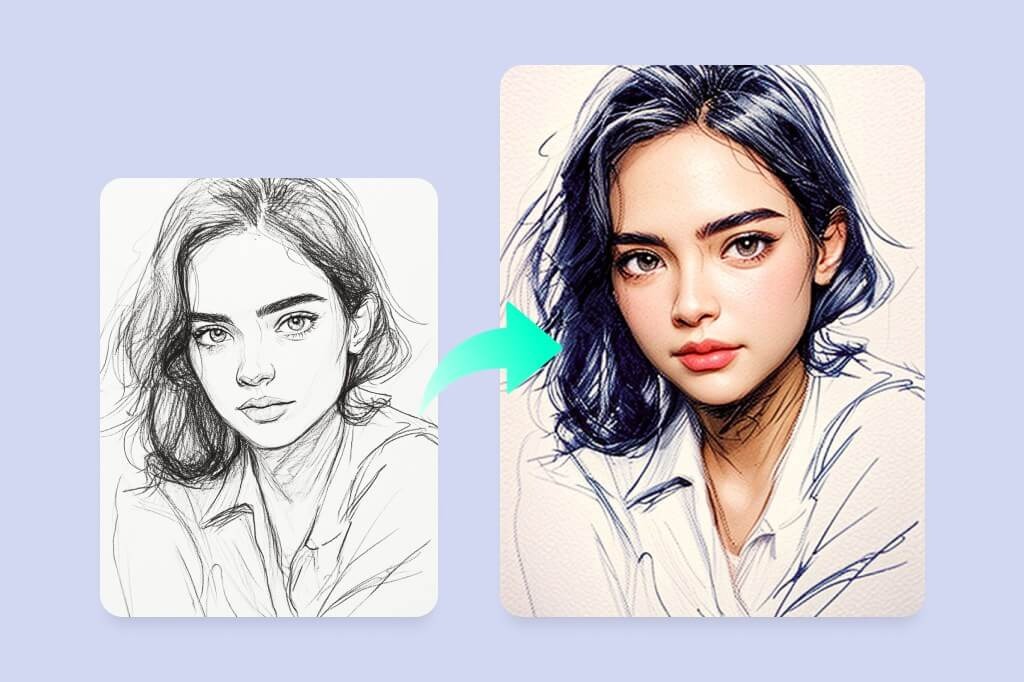
Selecting Correct Image for Conversion
Choosing the correct photographic basis is absolutely vital before starting a physical sketch. Simplified into lines, not every image performs as it should. Usually, a good picture shows well defined borders and separates foreground from background. After conversion, high-contrast photos aid to preserve drawing clarity. Crisply defined edges help one translate faces and structures more easily. This makes significantly more effective technical decisions including line thickness.
Think of a hazy portrait against one with sharp edges. Most likely, the later will produce a more legible and powerful sketch. When choosing an image, search for one where the subject stands out organically. Sometimes even minor changes in contrast or brightness transform a world. Advanced editing tools let you change your picture before conversion, therefore preparing the canvas for a better drawing.
Making a little print-out of the picture is a nice approach to test. Examine the elements closely. Try pencil-based tracing of the main outlines. While some ask for a finer touch, this basic exercise may find elements in the picture that best suit bold lines.
Trial and Error Learning from Mistakes
Every artist falls a few steps short. One might first overdo broad lines, rendering the drawing a caricature. On the other hand, too many fine lines might make the drawing seem insubstantial. You are looking for the sweet spot. Count on your instincts. Sometimes the finest instructor is a drawing that deviates from intended course.
Share your work with colleagues. Requesting lighthearted comments could inspire fresh concepts. A fresh set of eyes might even highlight an unanticipated feature you had overlooked. With time, this habit might help to define your style. You will start to automatically alter line weights without second-guessing.
Technical Points of View in Digital Conversions
There are plenty of internet programs available today to enable photographs into line drawings. Certain applications allow line width to be changed at will. Try these functions. Digital drawing tools give versatility and accuracy. They also allow you almost instantaneous comparison of variants. Just a few clicks will enable you to switch between several styles until you come upon one that makes you happy.
Your laboratory is these instruments. Recall that little changes in line width might provide a rather different result. As you work, notice settings that might most appeal. Before conversion, digital trickery could involve changing brightness, contrast, and edge detection sensitivity. Time is saved and a drawn-out redo procedure is avoided by experimentation. A little change here and there will produce an output that seems nicely balanced.
